There are multiple places a Skipper may cancel an event. The two most convenient are the Annual Calendar and inside the Event when it is opened.
Canceling from the Annual Calendar
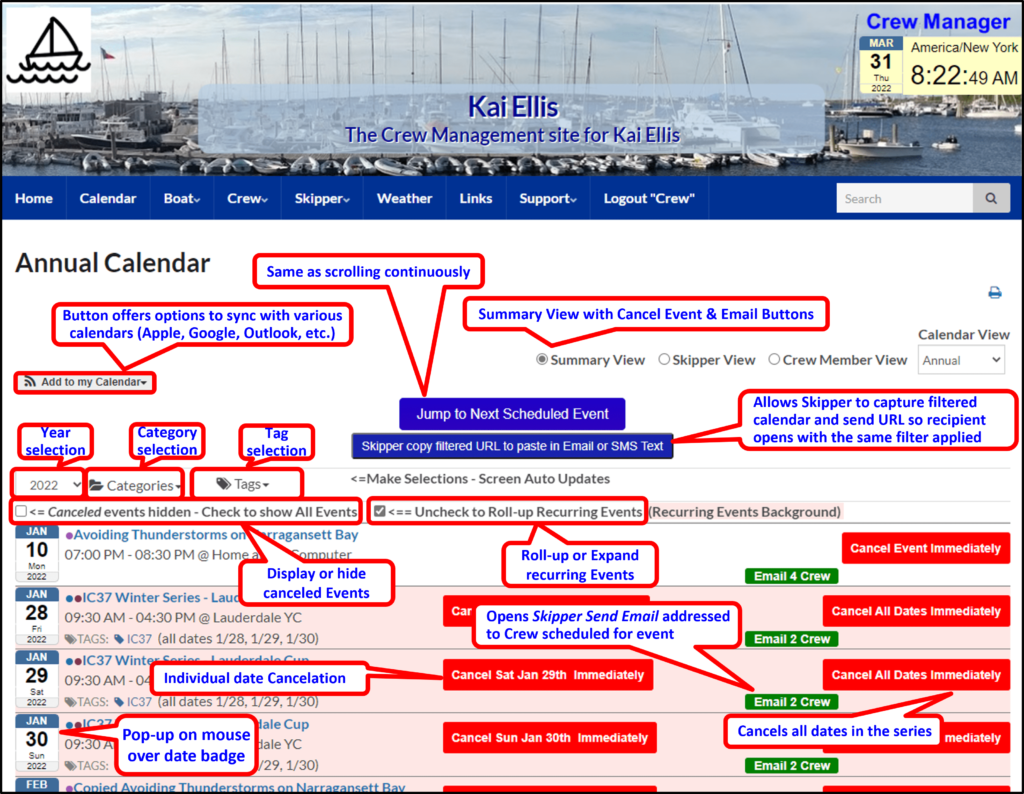
The Annual Calendar view displays cancel buttons in the row for each event in the Summary view. Each event displays to the Skipper a red button labeled Cancel Event Immediately for single events (events that are not part of a series, or when events in a series are displayed with two cancel buttons. One button cancels a single date in the series, while the other button cancels all events in the series. This is shown in the pictures below for a desktop display (similar displays are formatted for a phone). The Cancel Event Immediately, Cancel [~date~] Immediately, or Cancel All Events Immediately button is clicked to start the event cancellation process.
Annual Calendar Skipper View Summary – Desktop Display

Annual Calendar Skipper View – Phone Display

After the appropriate cancel button is clicked a dialog box appears. This box permits the following:
- Click ‘Cancel’ to take no action – aborts the cancellation and returns to the calendar display
- Enter optional text to include in canceled event in addition to the automatically added text This event is canceled and click ‘Ok’, or
- Just click ‘Ok’ to cancel with no optional text added to the event
Typical Dialog Box on Cancel Event

Once the dialog box is confirmed by clicking OK, the automatic cancellation process is started. The following is performed.
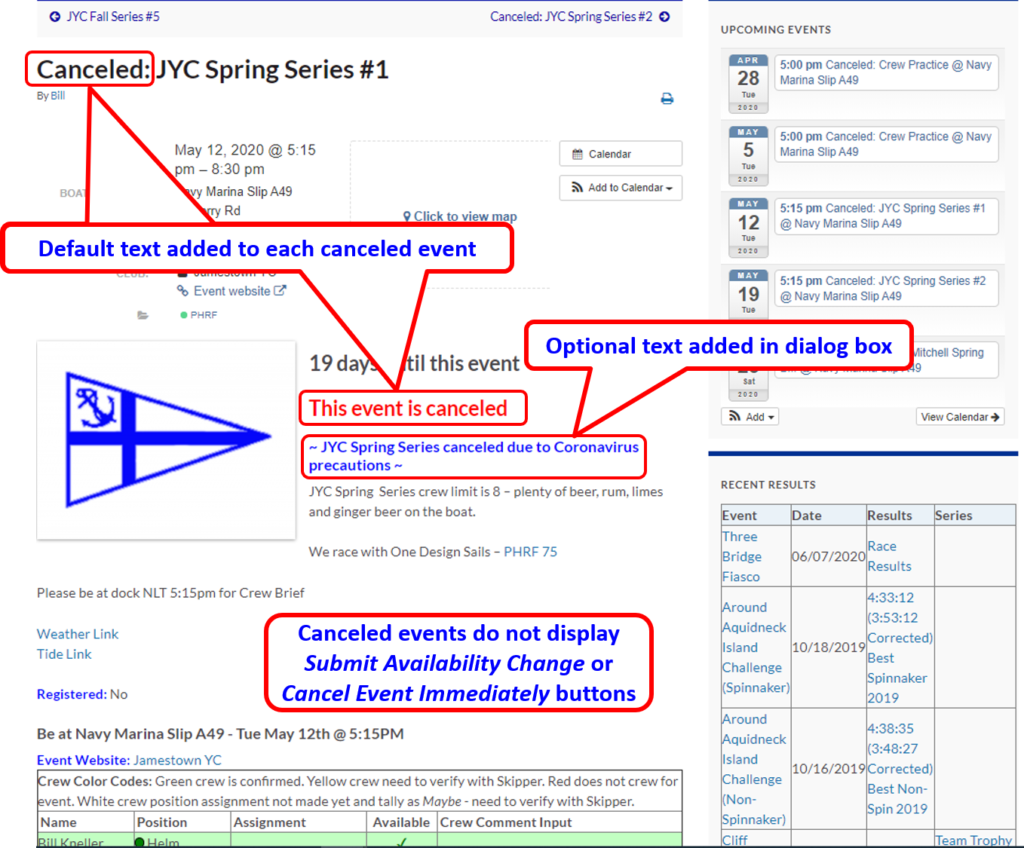
- The event subject is prefixed with Canceled:
- This event is canceled is added in bold red text to the event description
- Any text added in the dialog box optional text space is added to the event description as bold blue text
- The buttons for Submit Availability Change and Cancel Event Immediately are removed from display for that event.
- If emails are enabled, all crew scheduled for the event are notified via email (and text message if enabled in their crew profile) that the event is canceled.
- The Skipper receives an email report indicating that an event cancellation message was sent and displays who it was sent to.
Canceling Inside an Event
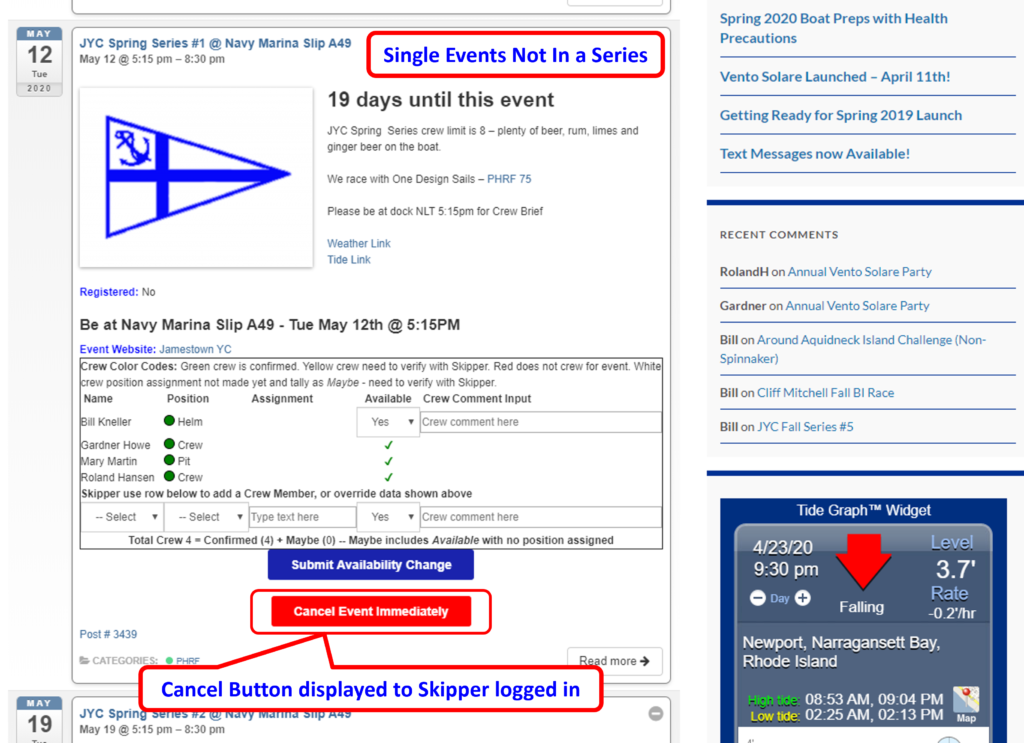
Each event displays to the Skipper a red button labeled Cancel Event Immediately for single events (events that are not part of a series, or when events in a series are displayed with two cancel buttons. One button cancels a single date in the series, while the other button cancels all events in the series. This is shown in the pictures below for a desktop display (similar displays are formatted for a phone). The Cancel Event Immediately, Cancel [~date~] Immediately, or Cancel All Events Immediately button is clicked to start the event cancellation process.


After the appropriate cancel button is clicked a dialog box appears. This box permits the following:
- Click ‘Cancel’ to take no action – aborts the cancellation and returns to the calendar display
- Enter optional text to include in canceled event in addition to the automatically added text This event is canceled and click ‘Ok’, or
- Just click ‘Ok’ to cancel with no optional text added to the event

Once the dialog box is confirmed by clicking OK, the automatic cancellation process is started. The following is performed.
- The event subject is prefixed with Canceled:
- This event is canceled is added in bold red text to the event description
- Any text added in the dialog box optional text space is added to the event description as bold blue text
- The buttons for Submit Availability Change and Cancel Event Immediately are removed from display for that event.
- If emails are enabled, all crew scheduled for the event are notified via email (and text message if enabled in their crew profile) that the event is canceled.
- The Skipper receives an email report indicating that an event cancellation message was sent and displays who it was sent to.

Cancel Event Phone Displays


